Tuesday, February 9, 2016

Diy Valentines day card

Valentine's Day diy card


Instructions:
1. Draw an heart shaped outline on the card with pencil. Use only pencil as we will have to erase it later.
2. Create holes along the outline keeping equal space in between each other.(This is just for ease). Also one hole in the middle of the heart.
3. Take a red thread ( i used anchor) knotted at the end and start sewing from the middle to any hole on the outline back to the middle and again to the next hole along the outline. Continue doing this along all the holes on the outline. Finish off by tying a knot and cutting off the rest of the thread.


Friday, January 8, 2016

Swiss roll recipe

 Swiss roll / Jam Roll / sponge cake


Ingredients:

4 large eggs

1 large (20 grams) egg yolk

1/3 cup (35 grams) sifted cake flour

3 tablespoons (30 grams) cornstarch (corn flour)

1/2 cup (100 grams) plus 1 tablespoon (15 grams) granulated white sugar (divided)

1 teaspoon pure vanilla extract

1/4 teaspoon cream of tartar (optional)

Raspberry Whipped Cream:

1 cup (240 ml) heavy whipping cream (double cream) (35-40% butterfat)

1/2 teaspoon pure vanilla extract

1 - 2 tablespoons (15-30 grams) granulated white sugar

1/3 (80 ml) raspberry jam (or other flavored jam) or 1/2 cup (120 ml) lightly sweetened raspberry sauce or strawberry sauce


Instructions:

For Sponge Cake: Preheat oven to 450 degrees F (230 degrees C) and place oven rack in the center of the oven. Butter, or spray with a nonstick vegetable spray, a 17x12 inch (43x30 cm) baking pan, line it with parchment paper, and then butter and flour the paper (or spray with a nonstick vegetable/flour spray).

While the eggs are still cold separate two of the eggs, placing the yolks in one bowl and the whites in another bowl. To the yolks, add the additional yolk, and the two remaining eggs. Cover bowls with plastic wrap and allow the eggs to come to room temperature (about 30 minutes). Meanwhile, in a small bowl whisk the flour with the cornstarch.

Place the egg yolks and whole eggs, along with 1/2 cup (100 grams) of the sugar, in your electric mixer, fitted with the paddle attachment. Beat on high speed for five minutes, or until thick, pale yellow, and fluffy. (When you slowly raise the beaters the batter will fall back into the bowl in slow ribbons.) Then beat in the vanilla extract. Sift half the flour mixture over the beaten egg mixture and fold in gently with a rubber spatula, just until the flour is incorporated. Sift the remaining flour mixture into the batter and fold in.

In a clean bowl, with the whisk attachment, beat the egg whites until foamy. Add the cream of tartar and continue beating until soft peaks form. Sprinkle in the remaining one tablespoon sugar and beat until stiff peaks form. Gently fold a little of the whites into the batter to lighten it, and then add the rest of the whites. Pour the batter into prepared pan, spreading evenly with an offset spatula or spoon. Bake for about 6-8 minutes or until golden brown and when lightly pressed, springs back. Immediately upon removing the cake from the oven sprinkle with confectioners sugar and then invert the cake onto a clean dish towel. Remove the parchment paper, sprinkle with confectioners sugar, and roll up the sponge, with the towel. Place on a wire rack to cool.

For Raspberry Whipped Cream: Place your mixing bowl and whisk attachment in the freezer for 15 minutes. Then place the whipping cream, vanilla extract, and sugar into the bowl and beat until soft peaks form. Add the jam and beat just until stiff peaks form.

To Assemble: Unroll the sponge, spread with the cream and reroll. Cover and chill in the refrigerator for a few hours. Just before serving, dust with confectioners sugar.

Serves 10-12 people

Friday, November 20, 2015

Reindeer Christmas decor diy

" Rudolph the red-nosed reindeer had a very shiny nose "


Wondering what decor to make this year for your Christmas tree ?? Let's make this red-nosed fellow.. Very cute and very easy diy.

Let's start..

1. Draw the face, antler (horns) and nose of the Rudolph on to a paper and cut it out if u wish to make more than one. You can use this as a guide so that all of them would look similar


2. Now traceout the face onto the brown felt and cut two pieces of the same shape and size. Then the black antlers two of them and one red nose.


3. Stick the red nose on one of the brown felt and that's his shiny red nose. Stitch the mouth for which i used red thread and the eyes with black.

4. Now time to stitch together both the brown face starting from right side down. After u stick together the first ear fill it will cotton then between the brown pieces keep one antler and a thread to hang it, later the second antler and stitch it all till the end of the second ear. Now will fill in cotton in the second ear and sitch it all the way down leaving 1 inch to fill in the cotton on the face. Stitching the remaining one inch when you are done with filling of cotton.


Tadaa.. That's it

Enjoy crafting

               Chalked by Akhila

Friday, November 13, 2015

Zebra Cake


ZEBRA CAKE


Dry ingredients:
Flour - 2 cups
Baking powder - 2 tsp
Salt - 1/4 tsp
Sugar - 1 cup

Wet ingredients:
Butter - 1/2 cup
Egg - 2
Vanilla - 1 tsp
Milk - 1 cup

Coco powder - 2 tbsp ( to be mixed at the end)

Mix dry and wet ingredients separately and later combine both with a beater or wooden spoon. Divide the batter into half and add coco powder to one portion.

Well grease the pan with butter and flour so that you can get the cake out of the pan with ease.

Add 3 tbsp of plain batter to the middle of the pan then 3 tbsp of coco batter and continue till the batter is over. Make sure you don't shake or spread the batter with spoon or anything. It will spread by itself when u pour the batter in the middle of the pan.

Bake it at 180 degree for 40 min or till the toothpick inserted comes out clean.

Enjoy baking.. :)

                      Chalked by Akhila 

Monday, November 9, 2015

DIY Giant Paper Sunflower

DIY Paper Sunflower
In search of a pretty huge decor to fill in my empty walls, i came across this craft which was perfectly beautiful to fill in those empty spaces.  Loved the vibrant color and the beauty of this simple craft that changed the entire appearance of the room.

Does it look complicated?? Na... Its such a simple thing you can do within 30 min. If not the yellow black sunflower you can even change colors to match your walls.

Common let's make one 

1. Cut out a round cardboard piece of your desired size.


2. Cut out square shaped yellow color 4*4 size chart paper pieces about 36 of them. And black color square chart paper pieces about 6/8 of them which should be of a smaller size than the yellow.


3. Roll the yellow square to a cone shape and staple it to keep it in place. It would be better if rolled and staple everything at once to save time. Now it's time to stick the yellow cones on the cardboard keeping a gap between each one of them. Stick it starting from the ends on the cardboard.


4.When the first row is over the second row of rolls should be stuck between the gaps which should be kept a bit lower than the first row. Continue till you reach almost the middle which should b now filled with the black rolls of chart paper. That's it. Woohoo... :)


Enjoy crafting... :)

                     Chalked by Akhila 

Thursday, November 5, 2015

DIY Woolen Thread Bunny

Woolen Thread Bunny


Running out of time to go buy a gift for someone ? Here it is, a very cute fluffy bunny that's gonna steal your heart.

Own one for yourself too.I gifted myself with two of these.. :D he..he..

Come let's make a bunny cutie :)


Instructions:
1. Select the desired woolen thread of your choice. Either 2 colors or one.


2. Make 3 pom pom (thats what its called ;P) of three different sizes. The body part will be the biggest, the next smallest the head and the very small will be the tail.


3. Stick the head to the body and the tail with glue or u can even stitch it tight.

4. Select the required color for the ears were we will be using felt. Cut out the ears and glue it on the head on both sides


5. Glue the eyes with black beads


Look at those fat fluffy little fellows.


Enjoy the cuteness ...!!


Chalked by Akhila


Monday, November 2, 2015

Super Easy Chocolate Cake

So.. its that time of the year again to pamper my husband. It's his Birthday... Yuhuuuu !!! 

Keeping all the other fun items i needed to get my hands on, i landed on this super quick and definitely delicious chocolate cake. 

Next time u need to cook up something quick and yummy, try this one :) 

So then lets get started..... 


Ingredients:

2 cups sugar ( better if it's brown sugar )
1 3/4 cups all-purpose flour
3/4 cup unsweetened cocoa powder
2 teaspoons baking soda
1 teaspoon baking powder
1/4 teaspoon salt
2 eggs
1 cup buttermilk
1 cup strong black coffee
1/2 cup vegetable oil
2 teaspoons vanilla extract

Directions:
Heat oven to 180°. Grease and flour two 9-inch round baking pans or one 13x9x2-inch baking pan. Set aside. In the bowl of a stand mixer fitted with the whisk attachment or in a large bowl with an electric mixer, combine the sugar, flour, cocoa, baking soda, baking powder and salt. Mix on low until dry ingredients are thoroughly combined.Add eggs, buttermilk, coffee, oil and vanilla. Beat on medium speed for about two minutes; the batter will be thin.Pour batter evenly into prepared pans.Bake in preheated oven for 30 to 35 minutes for round pans, 35 to 40 minutes for rectangular pan or until wooden toothpick inserted in center comes out clean.Cool 10 minutes; remove from pans to wire racks. Cool completely. Frost as desired. I used a simple whipped cream between two layers of the cake.

Notes:

1. Preferably use brown sugar than the normal sugar as it lifts up the flavor.

2. This cake also pairs beautifully with a simple chocolate ganache.
3. Before frosting, Spray sugar water all over the cake, this makes it super moist :) 


Try it out and let me know if you liked it.... 

Happy Cooking:) 

- Chalked by Akhila

Wednesday, April 2, 2014

Applying for your kid's passport

My experience at Bangalore Passport Seva Kendra (PSK)
  1. Visit http://www.passportindia.gov.in Register and fill in the application and submit. There are two options – 1. Fill online form and submit 2. Fill the downloaded form and upload the completed document.
  2. Submit the form and complete payment online to schedule appointment at the nearest Passport Seva Kendra.
  3. There is a walk in option for kids below 3 years old from morning 9.30am-11am. T&C as follows :- Applicable for infants below 3 years of age whose parents hold valid passports, with one of the parent’s passport containing Spouse name.
  4. Take all the required documents including the payment receipt and submitted application form.
  5. Reach the PSK 15 mins before the scheduled appointment. The reporting time will be mentioned in the payment receipt. The security personnel will let you in only after checking the appointment letter.
  6. Then stand in the queue to collect the token number after document verification. There is a separate queue for minors and senior citizens.
From here your counter to counter trip starts.
  1. The first counter verifies your photocopies and originals.
  2. Then proceed to the next counter to get the photo clicked and finger prints taken and documents uploaded. Note that photographs of kids below 4 years need to be brought by parents and not clicked at the venue.
  3. The next counter is again a Verification Counter where all the photocopies and originals are re-verified.
  4. The final counter is the granting officer who signs off the file as approved after a random check.
  5. Collect the acknowledgement letter from exit counter.
  6. Wait for the passport to arrive by post. 
Facilities at PSK Bellandur ORR
- Cafeteria
- Baby Feeding room
- Washrooms
- Photocopying machine
- Paid Parking
Documents Tips
 
  •  For minors, the following documents are required
    • Proof of present address in the name of parent(s)
    • Proof Of Date Of Birth
    • A Declaration affirming the particulars furnished in the application about the minor as per: Annexure 'H'
    • Attested photocopy of Passport of both or either parent
    • Photograph if the kid is below 4 years old. Recent coloured passport size (4.5 x 3.5 cm) photograph with a white background. It is better to click a few pictures of your baby In plain background and get the background changed and photo cropped to the required size from a photo studio. Though smiling pics are cute, try to get photos of your baby with mouth shut, ears seen, eyes open and natural expression. Difficult but manageable when clicked full size and later cropped.
  • Documents can be attested by either of the parents.
  • Aadhar can be submitted as address proof only if Aadhar card issue date is more than a year from passport application date. If not, it should be accompanied by another address proof.
  • If submitting income tax assessment form as address proof, you may be asked for pan card copy too. It happened to me. So carry your pan card original and photocopy just in case.
  • It is much easier to apply when both parents passports mention spouse name. That avoids the police verification step too.
  • It is also easy when you have stayed in your residence for more than a year when it comes to the matter of address proof. Be it telephone bill, water bill, aadhar card, bank statement, etc, they request for one year proof. So in case you are planning to shift your home and also have plans to apply for passport for your kid, I recommend you do the latter first, get the passport and then shift. Otherwise you need to fill a supplementary form and get the application done.

Wednesday, January 8, 2014

Adai Dosa

Dosas are my favorite mode of breakfast. This is mainly because, for the working mum I am, it gives me the freedom to enjoy that extra wink of sleep in the mad mornings! :)
So this was the day when I  could use some variety for the normal Dosa recipe. The result.. Here goes....
What you'll need:
* raw rice - 1.5 cups
* urad dal - 1 cup
* Toor dal - .5 cup
* Channa dal - .5 cup
* cooked rice - 1.5 cup
*
Soak separately raw rice, urad dal , and the mix of toor and channa deal for about 6-8 hours
Grind urad dal to smooth paste.
Then add in raw rice and other dals and grind along with the cooked rice
Mix all together.
Add small onion and curry leaves chopped finely.
Salt as needed
And you're ready to try your skills at spreading a perfect dosa!
 
 
- Chalked by Megha Kuruvilla
 

The Best Chocolate Custard Biscuit Pudding I Ever Made and Had!!!

Chocolate is my favorite part of every cuisine. And this particular combination of custard chocolate and pudding instantly caught my eye.
 
Should tell you that this is the best ever version of biscuit pudding I've ever had. The first set i made got over before i could even catch a click of it. This is the second set i made in two consecutive days and I'm lucky that my camera could catch a glimpse of it before it vanished :)
 
Thanks to my friend Ria's blog, the source of this recipe.
 
So here goes... get ready to be dazzled :)
 
 
What you'll Need :
** Chocolate -150gms  (Dark chocolate as per original recipe, but i substituted it with normal Amul chocolate bars the first time i made this.. .and it is more yummier !!)
** Biscuits - 10 to 15 or as needed
** Condensed milk - 1 tin of
** Milk -1 condensed milk tin
** Egg - 4 yolks
** Custard Powder -2 tblsp ( My addition to the original recipe)
** Vanilla essence - 2 tsp
** Coffee powder -  enough to make a cup of strong black coffee
 
Let's do the Magic !!!
** Melt the chocolate
** To little of the milk mix custard powder and dissolve well.
**To the melted chocolate add 4 egg yolks ,condensed milk, custard powder mix and the milk
** Mix well
** Put it on the stove and stir continuously. NOTE: Dont forget to Stir continuously. As chances of it getting burnt is very high.
** This step does take some time, as we have to cook it till the mixture starts thickening to a custard consistency. Add vanilla essence.
** Once its thickened and boiled, remove from fire and set aside.
 
For the setting
** Make black coffee, maybe about a cup.
** Dip the biscuits in the coffee and line the pudding dish. I stopped with two layers, but we can surely have about 3 as you'd like.
** Pour the custard over the biscuit layers and put it into the fridge to set for sometime.
Relish the finger licking goodness :)

- Chalked by Megha Kuruvilla

Wednesday, December 25, 2013

How a small donation drive made a joyous Christmas

It was not a big deal until the kids called me over phone today and sang a Christmas Carol and wished me “Merry Christmas and Happy New Year”.  I realized how a small action of donating old clothes to an orphanage made a big difference to them.  


I had a bag full of unwanted clothes that was taking up space in my wardrobe. Most of the NGOs had donation drop-off centers which were quite far from my home and the donation was too little to request for door pick-up. When I checked with my apartment residents, many volunteered for donation. So I started my search for a NGO that will come to our apartment for collection. To my surprise, all the big famous charitable organizations that come in Google search due to their ‘good marketing funding’ were reluctant to facilitate donation drive at our venue and some didn't even respond. Then I found a request for help in one of the online yellow pages by a small orphanage and when approached, they were very happy to accept our contribution.


I passed on the information to all the residents through our apartment online forum and by putting up posters on notice boards about the donation drive being organized.

On the planned event day, I was overwhelmed to see the collection box overflowing with goodwill gesture. I had promised one medium sized box of clothes to the orphanage and when they came to collect, they were amazed to see their goods auto rickshaw completely filled with material donations that included clothes, blankets, toys, school stationery, etc. 

Seeing the success and positive vibes of the charity event, I wondered why each apartment complex or gated community couldn't adopt one such organization and conduct small donation drives once a year. This could be a great help for those needy people. But when the children contacted me to convey their Xmas and New Year wishes today, I really want this small initiative implemented at all gated communities and apartment complexes. The community living is becoming so popular in India that the resident associations can easily implement community relations measures. Even a small scale event can help in a big way and create a good impact.

My recommendation would be to approach small charity foundations and orphanages that cannot afford marketing initiatives to advertise for support. Also do take care that your contributions can be reused by someone and do not dump your old ragged stuff. It is worth mentioning to be aware of fake establishments that collect old clothes and find their way into the seconds market.

Hope my experience will cause a ripple effect and I can see many more such noble initiatives being adopted by others.


                                                     -Chalked by Rashmi Sreedharan


Monday, November 25, 2013

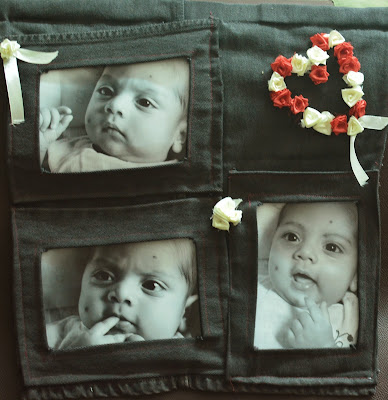
DIY: Photo Frame from old Denim!!!


As a matter of fact the number of worn down Denims in my house has been increasing by the odds! I'm sure many of you have the same problem. There were days when i didn't know what to do with them. But then there came a day when i started finding awesome ideas to recreate the rough & tough material into other items of interest.   

So now here's another idea to add to the other DIYs out of old denims!!! .... 


This was the product of my craving for a photo assemble for my wall. 

Bits n pieces of faults are there.... Hope you'll forgive me these in my first official DIY attempt. 


Almost everything in here is just assemble and get along with your sewing machine. So i just jotted down stepwise instructions for making the top layer of the frame!

So here goes: ...........

* Cut the Material as per the dimensions of the photograph, plus 1 inch for seams.

* Make a small opening at the centre as shown in this pic

* Cut along the diagonal lines , out towards the four corners of the frame.

* Be careful not to cut all the way up.

* Fold the triangles you've cut outwards and iron for better results.


Now there's just assembling and stitching left, for you to have a gorgeous wall hanger :)


- Chalked by Megha Kuruvilla


Thursday, June 13, 2013

Forest Thrills at Masinagudi


Bandipur
MudhumalaiThis must be my umpteenth trip through forests. But this one was a bit unique as it was a trip with friends.
Bison

Lion Tailed MacaqueWhat’s good about travelling to Masinagudi is that you cover two major Tiger Reserves on the way – Bandipur and Mudhumalai which are in two different states i.e. Karnataka and Tamil Nadu. So you can plan a jungle safari on the way if required. You also get to see herd of deers and wild elephants on the way. I have been lucky all the time and this time it was even better as I saw bisons, lion tailed macaque… Plus a wild elephant that almost rushed towards our car.

Singara Check Post
The Wilds at Northern HayNow this stay that we planned is a 150 year old cottage amongst a 90 acres coffee estate. The Wilds at Northern Hay at Masinagudi is about 5-6 hours from Bangalore. Once you enter Bandhipur forest, you automatically slow down to spot animals. From Bandipur, you enter the next forest section of Mudhumalai. Once you reach Masinagudi, you have to head towards Singara Check Post. Beyond that (due to bad roads or literally no roads), you cannot take your car unless it is a four wheel drive vehicle. There is no parking lot as such and you have to park your car at the check post.  We were a little concerned about the safety of car but when we came back, we didn’t find any damages except a few monkey footprints on the windows.


MasinagudiThe estate owners have already started expanding the accommodation options with tree houses and luxury cottages. But they have retained the old charm of the already existing one. The rooms are decorated with antiques. 

British CottageWe were welcomed by the caretaker and he gave an overview of the facilities and activities. Then we came to know that another guest have cancelled the booking due to bad weather. We were happy as we got the entire bungalow for ourselves. After refreshing, we went to the dining hall and we were served with delicious food. Our stomach was so full that we needed siesta.

Plantation walk
After having the evening coffee (try it, it’s awesome), we chose for plantation walk instead of jungle safari. Our guide Babu was also a caretaker at the estate played a perfect host and entertainer. He told that he came to this place at the age of 13 and been here for over a decade. First he showed us the tree houses and newly built cottages. Then his jungle book stories began. He narrated about sighting leopards and bears in the estate and how he was almost attacked by a tusker. His brother Salim, the cook, also accompanied us.

Jungle trek
The plantation walk turned out to be a jungle trek. On the way we saw fresh foot marks of bears and half eaten mole hills. I slowly picked up a stick to shoo the tiger away, in case I encountered one. Babu then consoled us by saying that the wild animal would attack the guide first and then turn towards the guests. Now how will the wild creature know which one is the guide here?

All Hollywood movies like Anaconda, Predator, Crocodile, and so on started flashing in my mind. I didn’t want to be walking behind, as always the last one gets killed first. Walking for two hours, other than paw marks, we saw lot of deers and then we went back to our rooms at sunset.

Meanwhile when Babu was arranging bonfire for us at an elevated ground close to the cottage, we skimmed through the guest books and read statements of spotting tigers, leopards and bears near the resort. So the caretaker’s tales had some truth.

At the campfire, I positioned myself facing the coffee estate so that I am ready to run when I see leopard. Barbecue option was also available but we didn’t opt for it. Babu made fresh orange juice for the ladies and it was so yummy. Dinner was even better. We had more than three servings of chilly chicken that Salim prepared.  
                              

The Wilds at Northern Hay
We chit chatted till late night safe and sound in the living room filled with antique hunting weapons and books. It was so quiet that I started getting shivers thinking that the bungalow may be haunted. But luckily I didn’t find any ghosts. We were strictly instructed not to stroll around at night as there could be wild animals around.

I woke up in the morning with the sound of something running on the roof and it was monkey menace. While serving morning tea, Babu started off with his set of stories on how monkeys spoilt his food arrangement and stole bowls. The breakfast though didn’t have much choice, was still tasty.

The Wilds at Northern Hay
We lazily sat in the portico on those old rocking chairs and arm chairs and funnily debated on what we would have done if we had met a bear or tiger during our trek.

By noon, we checked out and started our journey back to Bangalore.

Sunday, May 5, 2013

Apricot raisin cake

Ingredients:

1.5 cup flour
1.5 Cup sugar
4 Eggs
250g butter
1.5 Tsp baking powder
1 Tsp Cinnamon powder
1 to 2 Tsp vanilla essence
Apricot -- chopped finely
Raisins -- chopped finely
Method:
1. Caramelize 0.5 cup sugar.  Let sugar melt, remove from fire before it burns. Then add 1/4 cup water and keep on low fire till sugar crystals melt.
2. Sieve flour, baking powder and cinnamon powder together and keep side.
3. In a bowl beat butter and sugar till fluffy.
4. Add eggs and flour mixture alternatively and mix well.
5. Add vanilla essence
6. Finely chopped Apricot and raisins should be coated with some flour. This is to avoid it going to the bottom of the pan when baking.
7. Finally add the caramel and the fruit mix and once mixed pour into baking pan.
8. preheat oven to 180°c and bake for about 45 -55 minutes, or till done
9. Use tooth pick to prick and check if cooked well.
10. Once done let it cool and enjoy


- Chalked by Megha Kuruvilla

Monday, January 14, 2013

Choosing the right Relocators


Relocating can be a stressful task if the right agency is not chosen for shifting of goods. Normally the relocation agent visits your venue and inspects the goods and then shares a cost with you for shifting from one place to another. The cost normally includes packing, unpacking, loading and unloading from the vehicle, rearranging and unpacking, labour charges, etc.

So here are the tips:
  • Compare quotes. But think twice before choosing a vendor over another for a difference of Rs.500 – Rs. 1000. Reason: Costlier quotation may involve better packing options.
  • Clearly define the new location such as the availability of service lift and the floor number. Reason: There are chances of additional costs if the service lift is not working and for higher floors.
  • Vehicle choice. The agency may offer two choices of vehicles – open and closed. There may be a temptation to choose the open vehicle due to discounts. But keep in mind, weather conditions can damage your furniture.
  • Packing offers. All relocation companies offer packing of all household items. This is good. However, remember, they may literally throw your clothes into a carton without sorting out. This may become tedious for you when settling down at your new place. It is better to wash and iron your clothes and pack it yourself to make it easier once you shift. Or keep it ready nicely folded and differentiated for the vendors to pack. Insist that they pack your crockery and other breakable goods with bubble packing material.
  • Insurance is necessity. No matter how carefully things are packed or packed with the original carton boxes, there may still be damages. Check for broken stuffs before settling the bill.
  • Do research online for reviews on the relocation agencies. The marketing executive will be looking and sounding very professional but the actual goods are handled by workers who may not be professional enough. Check with your colleagues and friends on their experiences.

- Chalked by Rashmi Abhilash

Thursday, December 27, 2012

Calicut = Paragon Restaurant


Paragon


There were times when we had re-organized our travel plans to pass through Calicut during lunch hour to hop into this restaurant. Why? They serve the best Malabar Biriyani and Meals. 

Prawns
The restaurant is always buzzing with hungry foodies and sometimes you have to wait for nearly one hour to get a table. Sadly there is no advance reservation. This the toughest part as the aroma of Biriyani keeps lingering and that elevates your hunger even more.

Malabar mealsIf you order rice, see that you got enough space on the table for side dishes. Try the Prawns Tawa fry and also the day’s special menu. Chicken Biriyani is my favourite and it tastes amazing.

So the next time you visit Kerala, make sure to indulge in the mouth-watering Malabar cuisine at Paragon. It is one of the “Top Things To Do” at Calicut (Kozhikode).

Wednesday, November 21, 2012

The Fisherman's Wharf

Fisherman's wharf bangalore

Fisherman's wharf bangaloreFisherman's wharf bangalore
The Fisherman's Wharf as the name implies is a haven for the sea food lovers. Packed wth Buffets and ala carte of fresh sea food and more, even their ambience talks pure goan!!!
Fisherman's wharf bangaloreFisherman's wharf bangalore
Fisherman's wharf bangalore
Chilli Squid !!!!.. Just one of the many yummy others!!!


Fisherman's wharf bangalore
From the Salad bar!!! 


Fisherman's wharf bangalore
From the Dessert Table
Fisherman's wharf bangalore Not only the sea food but the desserts are also heart warming:)


 Last but not the least is the spread of cokctails mocktails and other drinks, to compliment your platter !!

Fisherman's wharf bangalore
Cocktails to Taste!!!!
Enjoy At:
The Fisherman's Wharf
Next to Mandovi Motors,
Haralur Road,
Off Sarjapur Road,
Bangalore - 560102.

- Chalked by Megha Kuruvilla

Popular