Showing posts with label Arts. Show all posts

Friday, November 20, 2015

Reindeer Christmas decor diy

" Rudolph the red-nosed reindeer had a very shiny nose "


Wondering what decor to make this year for your Christmas tree ?? Let's make this red-nosed fellow.. Very cute and very easy diy.

Let's start..

1. Draw the face, antler (horns) and nose of the Rudolph on to a paper and cut it out if u wish to make more than one. You can use this as a guide so that all of them would look similar


2. Now traceout the face onto the brown felt and cut two pieces of the same shape and size. Then the black antlers two of them and one red nose.


3. Stick the red nose on one of the brown felt and that's his shiny red nose. Stitch the mouth for which i used red thread and the eyes with black.

4. Now time to stitch together both the brown face starting from right side down. After u stick together the first ear fill it will cotton then between the brown pieces keep one antler and a thread to hang it, later the second antler and stitch it all till the end of the second ear. Now will fill in cotton in the second ear and sitch it all the way down leaving 1 inch to fill in the cotton on the face. Stitching the remaining one inch when you are done with filling of cotton.


Tadaa.. That's it

Enjoy crafting

               Chalked by Akhila

Monday, November 9, 2015

DIY Giant Paper Sunflower

DIY Paper Sunflower
In search of a pretty huge decor to fill in my empty walls, i came across this craft which was perfectly beautiful to fill in those empty spaces.  Loved the vibrant color and the beauty of this simple craft that changed the entire appearance of the room.

Does it look complicated?? Na... Its such a simple thing you can do within 30 min. If not the yellow black sunflower you can even change colors to match your walls.

Common let's make one 

1. Cut out a round cardboard piece of your desired size.


2. Cut out square shaped yellow color 4*4 size chart paper pieces about 36 of them. And black color square chart paper pieces about 6/8 of them which should be of a smaller size than the yellow.


3. Roll the yellow square to a cone shape and staple it to keep it in place. It would be better if rolled and staple everything at once to save time. Now it's time to stick the yellow cones on the cardboard keeping a gap between each one of them. Stick it starting from the ends on the cardboard.


4.When the first row is over the second row of rolls should be stuck between the gaps which should be kept a bit lower than the first row. Continue till you reach almost the middle which should b now filled with the black rolls of chart paper. That's it. Woohoo... :)


Enjoy crafting... :)

                     Chalked by Akhila 

Thursday, November 5, 2015

DIY Woolen Thread Bunny

Woolen Thread Bunny


Running out of time to go buy a gift for someone ? Here it is, a very cute fluffy bunny that's gonna steal your heart.

Own one for yourself too.I gifted myself with two of these.. :D he..he..

Come let's make a bunny cutie :)


Instructions:
1. Select the desired woolen thread of your choice. Either 2 colors or one.


2. Make 3 pom pom (thats what its called ;P) of three different sizes. The body part will be the biggest, the next smallest the head and the very small will be the tail.


3. Stick the head to the body and the tail with glue or u can even stitch it tight.

4. Select the required color for the ears were we will be using felt. Cut out the ears and glue it on the head on both sides


5. Glue the eyes with black beads


Look at those fat fluffy little fellows.


Enjoy the cuteness ...!!


Chalked by Akhila


Friday, November 2, 2012

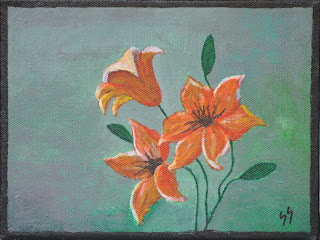
How to do acrylic flower painting


Starting with flowers is definitely an interesting way to create your skill. This is a painting for a beginner to medium experienced painters. Each layer is fairly thin(a glaze) because the paint colour is mixed with a small bit of water to make it flow more evenly. If you would rather use flow medium, that is acceptable also. Each layer of glaze must dry before the next layer goes on. Have patience! It is worth the time to get this technique right. Stick to the painting tips during these steps and you will be in a position to paint flowers with acrylic paint.


  1. Select how many flowers you will paint and how they will be organized. It doesn't need to be exact- just indicate general dimensions and placement.
  2. Prepare the actual canvas. Arrange the paints and brushes exactly where they are handy for the reach. Set your canvas on an easel or even work desk to start your work.
  3. Block in the background using the shades of your need. Let it dry; it won't take long.
  4. Draw the rough outline of the picture with pencil or chalk onto the background of the canvas. Use light outlines. Using a chalk, you can draw and erase loads of times and as long as you don't over-wet the surface, it will not hurt the painting underneath.
  5. Using a fine brush, paint the petals with Titanium White. Then paint a layer of the colour you need onto these white areas.
  6. Each petal has a highlight and shadow areas. In shadows, just blend in a layer of Payne's Grey. Then layer thin colour of the petal on it keeping it smooth.Keep the brush strokes going in the directions that the lines of the petals flowing naturally. The areas which will be highlighted will have to be underpainted with Titanium White again.
  7. Repeat actions for additional flowers. For those who have overlap to another layer associated with flowers, make sure to dry the first layer before adding to this.
  8. Add leaves as well as stems. Using a green paint, add in lines associated with varying thickness with regard to stems. Use a broader brush for making the leaves.
  9. Complete the painting. Let it dry. Apply varnish onto the painting and finish off the piece of art.


    acrylic painting

    Chalked by Sobiya Sudeep

    Tuesday, June 26, 2012

    Pot Painting

    Pot Painting


    The transformation of a simple clay pot.....

    Pot Painting

    - Chalked by Megha...

    Sunday, April 15, 2012

    To upcycle used glass bottles

    • Clean the glass bottle well to remove grease and dirt.
    • Use Fevicryl ceramic colours to apply color. Dabbing with a piece of sponge will add a special effect.
    • Apply two coats of the same.
    • We can use two colours together to enhance the effect.
    • Allow to dry for about 2 hours.
    • Use fevicryl 3D outliners to draw motifs.
    • Stick kundan stones or sequences on the bottle.
    • Use the same coloured thread for wrapping the bottle neck.
    • Finally give two coats of clear varnish to give shining effect and to protect form dust.


    -Chalked by Jothi Vinod

    Tuesday, March 6, 2012

    Wedding invite in style!!!!

    Wedding invite ... in style ... :D


    - Chalked by Bijesh Krishnankutty
     

    Popular